This is my first post about IPv6 and, as you can read in the title, is gonna be the first of a serie.
One thing that is driving me mad during these days is that on many sites, blogs, forums etc. there are a lot of explanations about how IPv6 works, but really few explanations on how to make it working.
So now I’m not gonna explain what IPv6 is, or how it works, because I’ll assume that the reader has at least a basic IPv6, IPv4 and UNIX / NetBSD understanding.
I’m gonna write down the steps I performed to get IPv6 connectivity ( assuming your ISP isn’t already giving you native IPv6 connectivity, otherwise you can stop reading now ) using a D-Link DSL-2640B aDSL modem-router with a standard firmware ( support IPv4 only ) and a NetBSD/i386 5.1 based router ( any computer with two NICs ).
I currently have no firewall on the DSL-2640 and no services / daemons running on the NetBSD router.
In this first post I will illustrate how to get IPv6 connectivity via a tunnel broker. There are many free services availables. I choose Hurricane Electric ( HE from now on ) just because a pair of friends already use it and told me that it works.
The tunnel created with an HE’s endpoint is static and request that you have a public pingable IPv4 address.
If you are behind a router that does NAT, like me, this could represent a problem, so I created this page to test if I can ping my public IPv4 address.
The solution I found was to move the NetBSD router to the DMZ, so when someone ping my public address, actually it sends ICMPv4 requests to my NetBSD router.
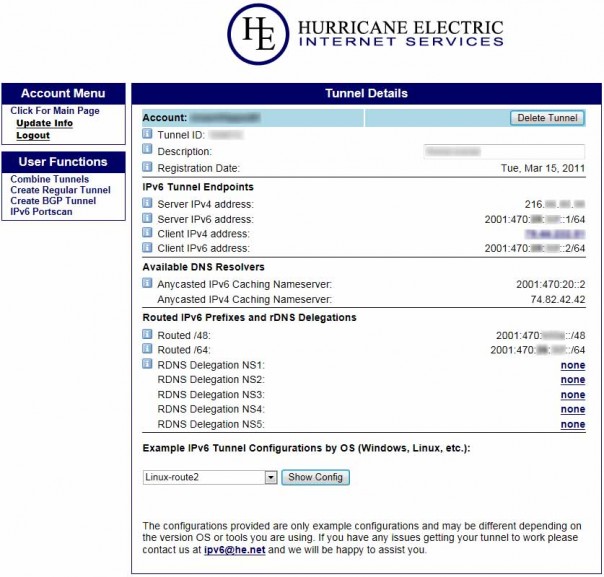
Creating a tunnel on the HE website is pretty simple, just look at the image below:

- Click;
- Insert your public pingable IPv4 address

Just remember, for this specific configuration, when configuring the tunnel interface on the router, not to use your public IPv4 address but to use the private address of your IPv4 gateway. So, to create a tunnel in NetBSD ( 4.x or 5.x ) type the following as root:
# ifconfig gif0 create

# ifconfig gif0 tunnel  $Your_IPv4_gateway   $Server_IPv4_address

# ifconfig gif0 inet6   $Client_IPv6_address   $Server_IPv6_address   prefixlen 128

# route -n add -inet6 default   $Server_IPv6_address
The tunnel should be up and ready. Just try to send an ICMPv6 echo request to someone using ping6, like ipv6.google.com ( you have to create and configure /etc/resolv.conf first ).
If you succeed, congratulations! You’re now on the IPv6 internet and halfway in configuring the router!
In the next part I’m gonna explain how to enable routing, configure the router advertisement daemon and make the configuration permanent.
Bye
No Comments