Archive for the ‘flight simulators’ Category


With the arrival from Hong Kong of the last adapter, I was finally able to finish my upgrade!

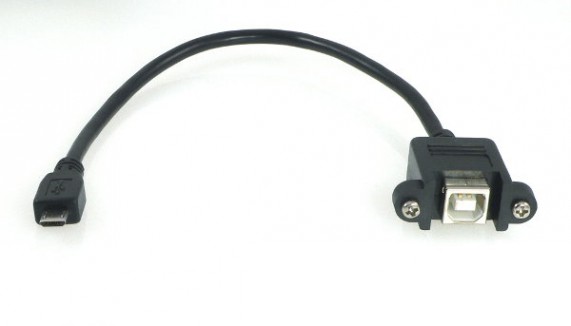
USB B panel mount connector

USB B panel mount connector

I enlarged the hole for the original cable and mounted there the panel connector. I can now use whatever USB cable (long or short) I like.

Joystick with USB B port mounted

Joystick with USB B port mounted

In the end, this was, after all, a ‘test project’. I’m not gonna use this joystick a lot because… well, I just bought a Thrustmaster Hotas Warthog, and it’s worth every cent I paid.

In conclusion, what I learned from this project?

  • When ordering more than one piece of electronic from eBay, especially from Hong Kong, it’s better to try everything when the items arrive, not just when one needs them.
  • Without both good gimbals and good springs there is not a good joystick. I did this upgrade because I’m attached to this joystick as it was my first “good” flight controller like 17 years ago and I didn’t want it to stay on the bottom of a box with other useless things. I don’t recommend anyone to buy this joystick with the purpose of upgrading it like I did. Maybe it’s better to buy an FCS Mark II or an X-fighter (better gimbals and better springs if what I read it’s true).
  • Cheap pots are cheap (Department of Redundancy Department here). What I mean is that I opted not to upgrade the pots with newer parts or hall sensors, partly because I’m lazy, partly because I think it was completely pointless (gimbals and springs). This means a lot of “garbage” on the analog inputs. Also, this means that the highest and lowest voltage levels change for various reasons (humidity, heat, planetary alignment…).
  • Flight Simulators are a niche product nowadays but the community is still alive and is doing fine. Cheap $5 Arduino’s clones are extremely versatile. They’re great, really great. Making the electronic parts for a flight controller (sensors excluded) has never been this cheap.
  • MMjoy2 is one hell of a software. It’s incredible, does everything, it’s free and open source (hosted on GitHub). I can’t be more grateful to the developer for making this fantastic work.

In the end,  my next project will be focused on the same upgrade to a Suncom F-15E Raptor joystick I bought used for €20. I’m also currently looking on eBay for old Thrustmaster TQSs (but the Hotas Cougar throttle it’s more appealing).

After all… it was fun. I’m not gonna use it very much, but I’m fine knowing I did this upgrade.


With two axis and one throttle the stick is suitable for a lot of activities (like flying a Cessna, with a set of rudder pedals), but not for military purposes. We need at least a trigger and a weapon release button (the trigger is used only for the gun, while the weapon release button, well release – or drop, or launch, or whatever – the selected weapon, except when the selected weapon is the gun) to use this joystick for combat sim.

Anyway, first things first: MMjoy2 allows two types of button’s connection.

  • Buttons connected via shift registers (any number up to 128 per device or a little less)
  • Buttons connected via button matrix (up to 100 via a 10×10 matrix but with some limitations because of the high number of I/O pins used)

If you want to connect a single button, you have to create a 1×1 matrix (silly concept, I know, but that’s the way it works). MMjoy2 guidelines states that over about 10 buttons, shift registers are the way to go. I agree, maybe not with 10, maybe over 16 I’d go with shift registers too.

Back to the Top Gun Platinum (by the way I’ve seen Top Gun – the movie – in a cinema recently for the 30 years anniversary! In – almost – 3D!), we have 4 buttons and a “China Hat” switch.
Let’s have a look to the “DASH 1” of the McDonnel-Douglas F-4E:

Stick functions from the T.O. 1F-4E-1

Stick functions from the TO 1F-4E-1

So we have the aforementioned trigger [TRG], weapon release button [WPR], an Air-Refueling Disconnect button [ARD] and a nose-wheel steering button [NWS]. Then we have the “China Hat” 4-way switch that is used for pitch and ailerons’ trim control.

In the Top Gun Platinum, as I already wrote in the first post of the serie, the hat switch was connected as an axis. I – more or less – destroyed the PCB under the switch to leave the four push buttons in the hat disconnected. Total numbers of buttons for the new configuration: eight.

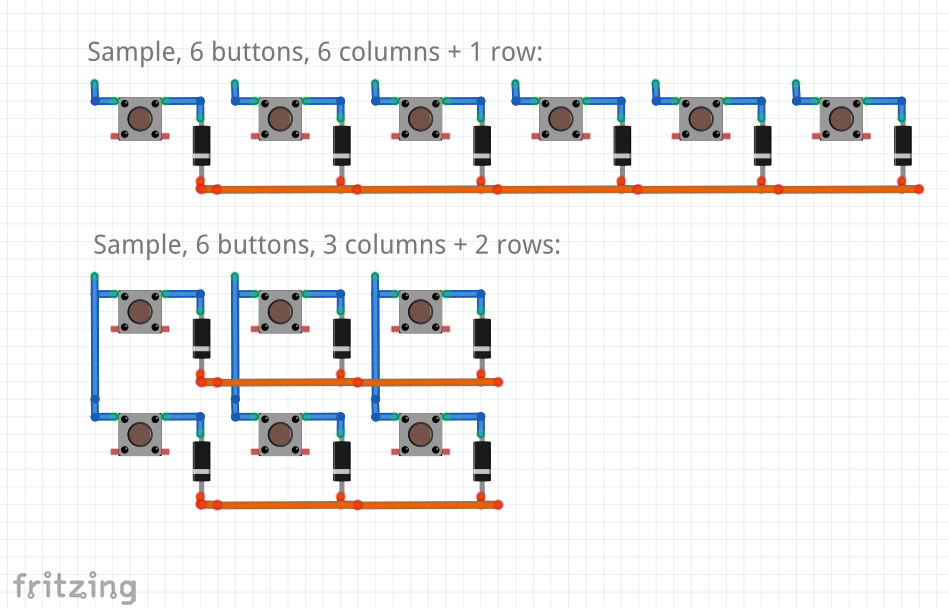
After a quick glance at the MMjoy wiki to check how to connect the buttons in a matrix using as less cables as possible, I decided to go with a 2×4 matrix, 2 rows and 4 columns.

How to connect a button matrix to the MMJoy

How to connect a button matrix to the MMJoy

The diodes are used to prevent ghosting and masking. I found a rather interesting article about those two problems with really simple to understand images. You can read more here [link]. For the diodes, I found eight identical signal diodes. They worked and so I decided to use them. 1N4148s are good to go.

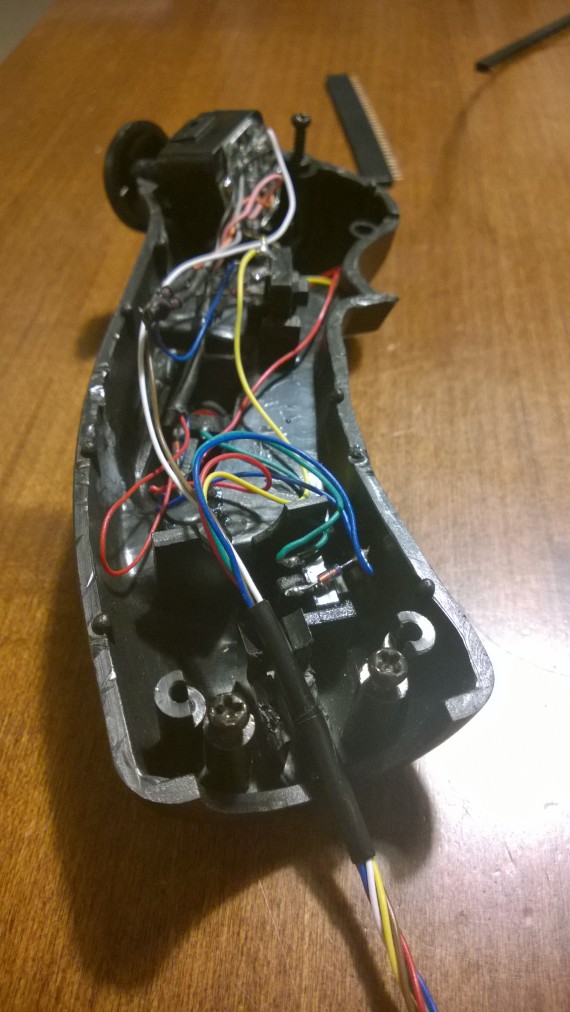
Here is the grip with the new connections:

Inside the grip


wp_20160921_07_21_45_pro Inside the grip

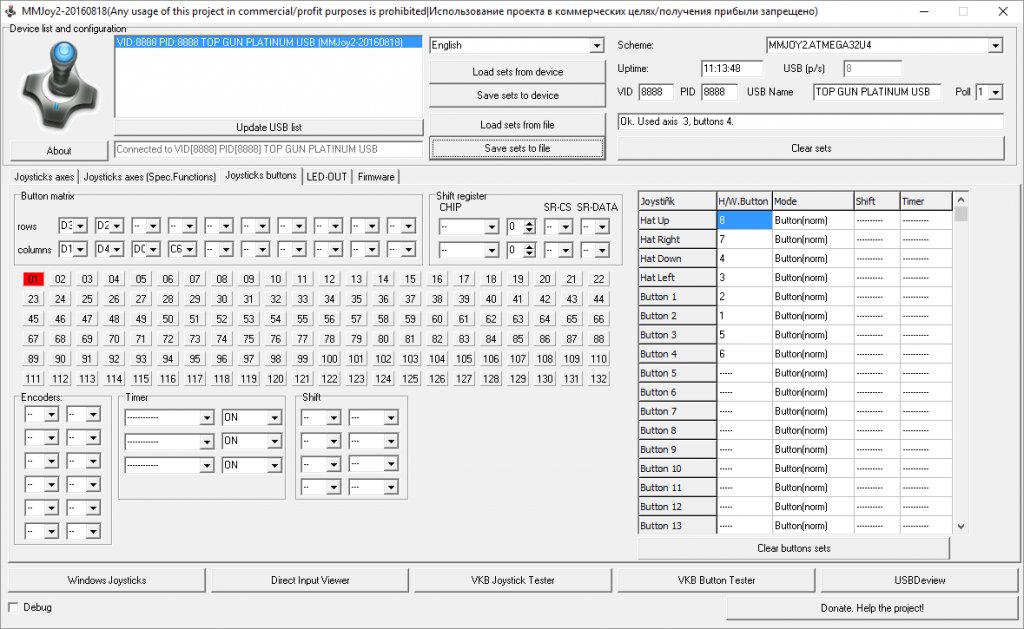
Once the buttons were connected to the Arduino, I started to setup the MMJoy settings for the buttons:

MMJoy setup utility

MMJoy setup utility

The really good thing about MMjoy is that any button in the matrix can be assigned to any button on the device. For instance, I like to assign [TRG] to button 1, [WPR] to button 2, etc. Also, any button can be assigned to the “Hat” up-left-down-right press.

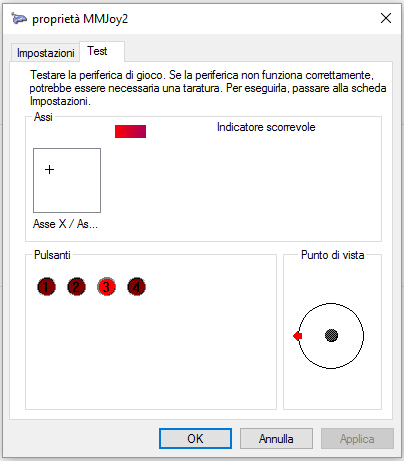
In the end, under Windows, this is a screenshot of the device check screen under Windows 10 control panel:

Windows 10 Joystick Control Panel

Windows 10 Joystick Control Panel

This pretty much sums up almost everything I’ve done. Next and final step will be about the finishing touches (but I’m still waiting for a pair of cables to arrive from Hong Kong).

Bye


With the arrival of two “Pro Micro” Arduinos from an eBay seller in Hong Kong (fast shipping, just two weeks, but one, unfortunately, is not working), work has started on the Top Gun Platinum!
My choice was to use the MMJoy2 firmware that is a really nice software. With MMJoy2 a compatible Arduino is seen as a HID device, so no drivers are needed and compatibility is assured 100% with every software. It’s a really powerful software and I really like it. Links here: MMjoy wiki (en).

Pro Micro Board

Pro Micro Board

The first step (at least for me) was to re-wire the pots (potentiometers) for the two axis and the throttle. The older game port connection worked as an ohm-meter by measuring the resistance of the pots used as variable resistance. The ATMega32U4 integrated ADCs simply read a voltage value between 0 and 5 Volts, from pots, hall sensors, external sources. That means that the pots have to be connected between Ground and 5V (Power or USB +5V) with the cursor connected to one of the ADC pins.

How to connect inputs to the MMJoy2-programmed board

Connecting inputs to the MMJoy2-programmed board

I decided to use wires from a CAT-5 Ethernet Cable for both the axis’ pots and the throttle’s pot.

Axis' pots rewired with wires from CAT 5 cable

Axis’ pots rewired with wires from CAT 5 cable

The throttle's pot with the new wires

The throttle’s pot with the new wires

I also put some grease on the gimbals and on the throttle axis. I used some teflon grease that should last some years (I hope).

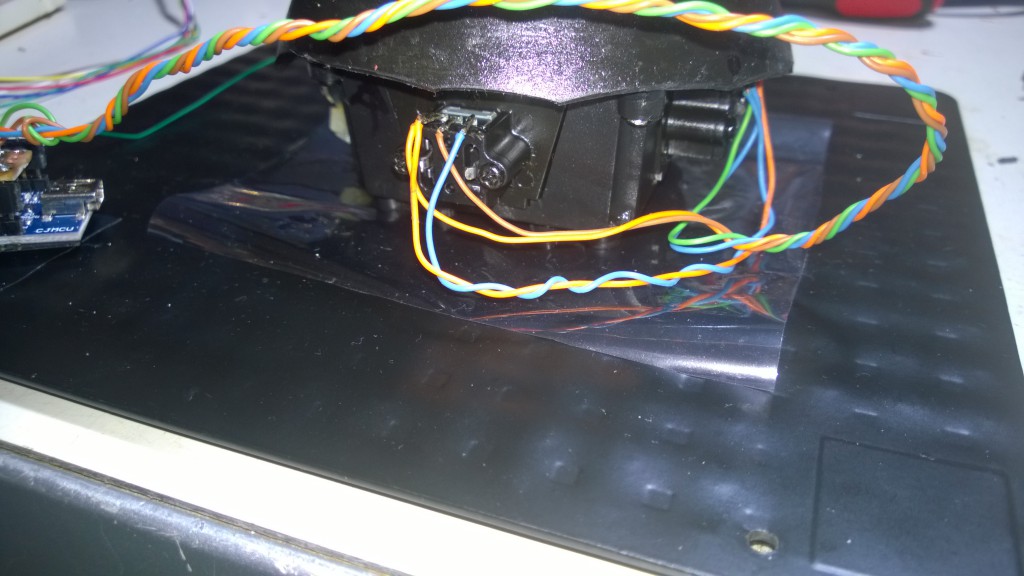
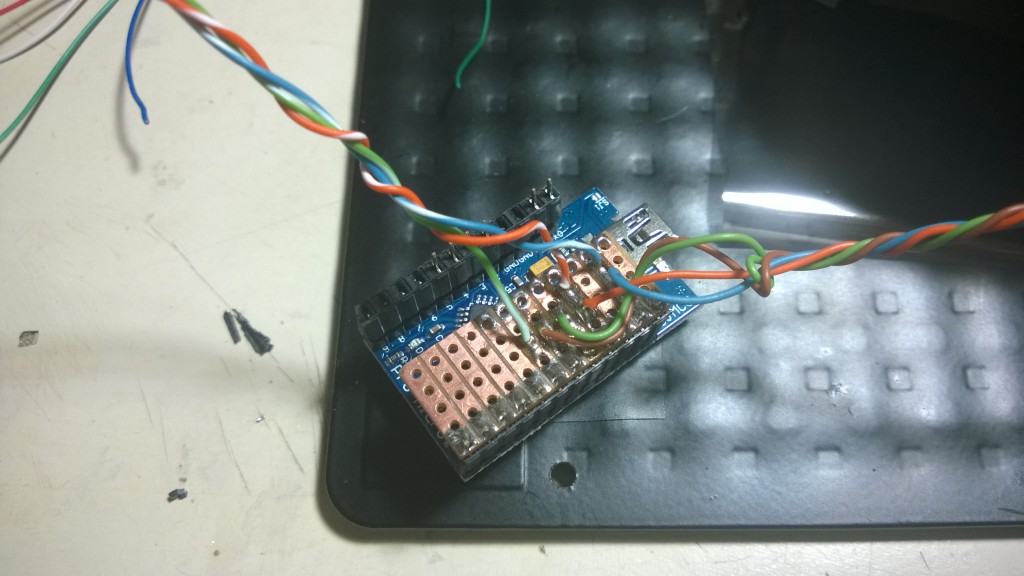
I then connected all the wires to a sort-of “shield” so I can easily swap the board, just in case…

Ghetto shield for axis connection

Ghetto shield for axis connection

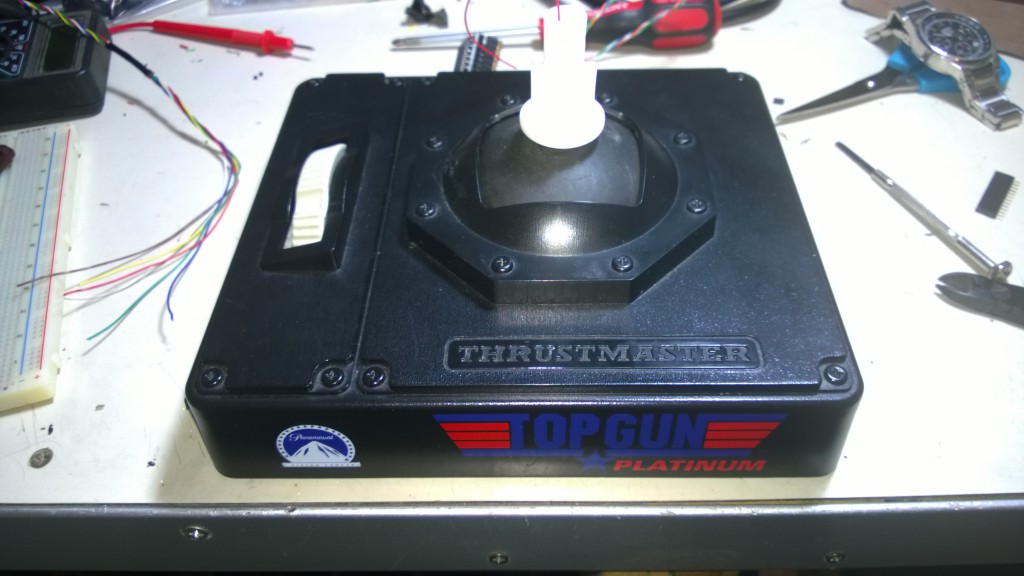
Just to make a simple test, I decided to close the base, leaving the board outside.

Board hanging outside the joystick base

Board hanging outside the joystick base

And then a final picture before connecting the base to the PC to test the pots and their connections.

The base closed before a quick test

The base closed before a quick test

The quick test went fine. Next part will be about connecting the grip’s buttons and China HAT (POV) switch.

Bye


(Part 1 of X as, honestly, I have absolutely no idea of how many parts this series of articles will last, anyway).
Oct. 1, 2016 update: Part 1 of 4 😉

If you’re reading this you probably know which company Thrustmaster is, what’s its main business and what are their most known products. Probably you’re a simmer.

If you’re not a simmer, that means a person which is interested in simulation (usually flight simulation), then maybe you don’t know Thrustmaster. This is their website: Thrustmaster.com (US).

Some Thrustmaster products really made history and any good simmer knows them:

  • Pro Flight Control Stick
  • X-Fighter Joystick
  • Rudder Control System
  • Weapons Control System – a programmable throttle controller
  • F-16 TQS and FLCS – full size programmable replicas of the F-16C’s throttle and stick
  • F-22 PRO – a full size programmable replica of the YF-22 stick (almost exactly the same as an F-16C, F-22A’s stick is different)
  • HOTAS Cougar – a renewed F-16’s HOTAS replica controller
  • HOTAS Warthog – a replica of the A-10C’s HOTAS

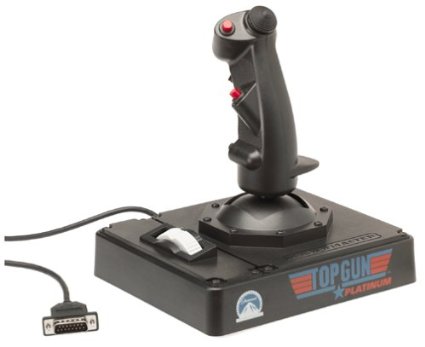
Back on topic, around year 1998/1999 my father bought me a Thrustmaster Top Gun Platinum joystick. The original “Top Gun” (the joystick, not the movie) was an X-Fighter joystick with simpler gimbals and directly attached potentiometers (from now on pots for short). The Top Gun Platinum added a throttle to the base of the controller with an all-black colour style.

Thrustmaster Top Gun Platinum

The joystick we’re talking about

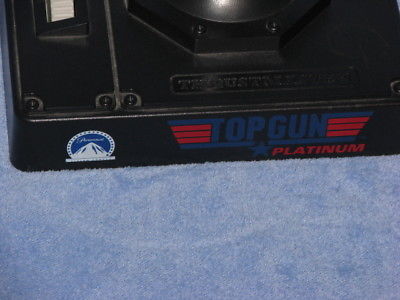
Top Gun and Paramount logos on the joystick

The joystick model with a big logo of Paramount

And now some (interesting?) technical details:

  • The stick is really similar to (but not exactly a replica of) a B-8 grip. The B-8 was a very widespread grip that was used on many US and NATO aircrafts, like the F-4 “Phantom II”, the A-10A “Thunderbolt II”, the Bell 206 “JetRanger III”, the Aermacchi MB-339 and many others.
  • The stick, as usual for that time was connected via game port.
  • It has 3 axis, four buttons and a four way “china hat” switch, usually used in simulators for changing the player’s Point of View (and therefore sometimes named HAT/POV) while in real airplanes is used for pitch and roll trim.
  • Thrustmaster used a “hack” for connecting the hat switch on this and many other joysticks before USB became the standard connection. Because game ports allowed to connect a total of 4 axis and 4 buttons, and the hat switch usually is implemented with 4 microswitches, there was a shortage of buttons that can be connected. Thrustmaster used an axis line and some resistors to send various resistance values to the game port. An “ad-hoc” driver inside the game or the operating system decoded the resistance values and used it as if 4 different buttons were pressed. The drawback is that only “up”, “down”, “left” or “right” directions were allowed (both mechanically and electrically) as it wasn’t possible to combine two commands simultaneously.

Now the project itself is about completely rewiring the joystick and converting it to USB using a cheap Arduino reprogrammed as a HID device.

Part 2 of X will follow when work will actually start.

Bye


Lug 27

I know, it’s been a long long time. I’m sorry, but I’ve actually got many things to do and I’m unable to find the time to turn the 3 / 4 draft I already wrote into “real” articles.
Probably you were expecting something on the end of the Shuttle era, the anniversary of the first landing on the moon, recent hauls… and you’re more or less right, just wait a little more.

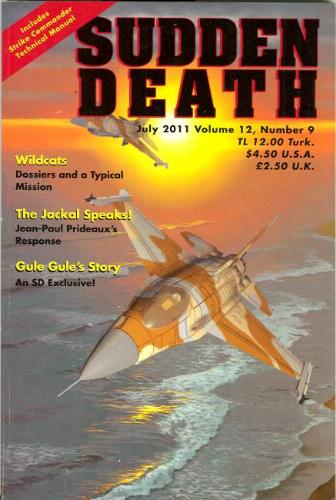
This post is just a reminder that was set 17 years ago ( yes, in 1994 A.D. ), when Lightning ( Intel 486DX2 ) was pretty new and when I first “flew” using Microsoft’s Flight Simulator 5.0, Spectrum HoloByte’s Falcon 3.0 and – the reason this post exists – Origin’s Strike Commander, the CD edition that included the “Speek Pack”, the “Tactical Operations” expansion and, of course, the July 2011 issue of Sudden Death… yeah, the July 2011 issue in 1994.

Cover of Sudden Death - July 2011 issue

Bye


Feb 24

Let’s start saying I’m really not a space enthusiast, although in my opinion the exploration of space and other planets is the future of humanity, so it could be interesting to know something about astronomy, astrophysics and space technologies.

Back in 1994 Microsoft released Space Simulator. I’ve never used it but, as I’ve found on various sites and forums, seems that the space vehicles the user could fly were all fictional, and that atmospheric flight was not simulated.

NASA reported that budget for the last STS mission, STS-135 / Atlantis, has been approved. Anyway, that means 2011 will be the year in which the Space Shuttle fleet will be decommissioned, after the final flights for Discovery, Endeavour and Atlantis.

While looking for some Space Shuttle’s videos, I found some videos made with Orbiter, so I started searching some info about this program.

Orbiter ( current version as of writing is Orbiter 2010 ), is a space flight simulator released for the first time in 2000. It simulates both space and atmospheric flight, it’s modular, so a large number of plugins and add-ons already exists, and it’s very realistic.
It’s also free, and you can download it following the link on the official site.
Without AA at low resolutions runs even on tomcat ( a laptop with a Pentium 4 2.4 GHz and 1 GB of RAM ).

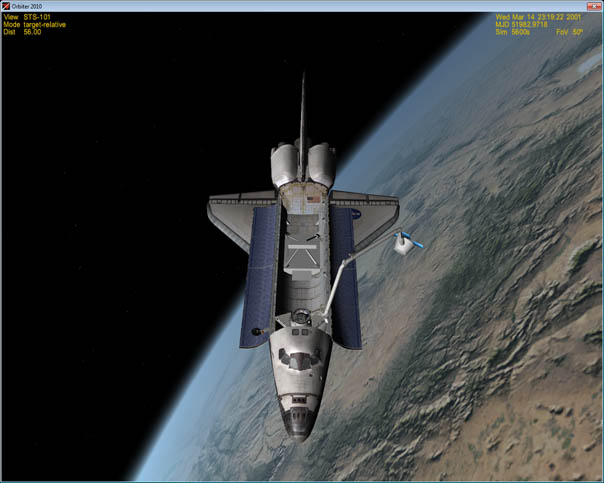
Atlantis in orbit with Canadarm ( in Orbiter 2010 )
Coming from more than 15 years of flight simulators doesn’t help very much during the first flights. It’s actually better to forget how to fly aircrafts and start to learn almost everything from scratch. Furthermore, Orbiter use the metrical system while in aviation, apart from Russia and some other former Soviet republics, the most used system is the US customary one, especially for distance ( nm ), speed ( kts ) and altitude ( ft ).

Let’s start saying that using orbiter is all but easy, so for the first flights, the Delta-glider is the best choice. This rocket-spacecraft is able to take off and land like an aircraft and has enough thrust not only to reach Earth orbit without using any booster, but also to change the orbit plane by several degrees ( something the OMS of an Orbiter can’t do ).
After learning how to get into orbit, change the orbit plane and period in order to synchronize it with that of another spacecraft / satellite / space station ( it takes some weeks… ) and last but not least, how to perform a correct re-entry manouver ( to land where you want, when you want, possibly without burning ), it is possible to do simulate other stuffs, like flying with the Space Shuttle to repair Hubble or simulating a transfer to another planet ( using time warp of course ) or to the moon, maybe with the Apollo add-on.

If you like new challenges and you don’t bother about learning a lot of things before even leaving the ground, I strongly recommend you to try Orbiter.

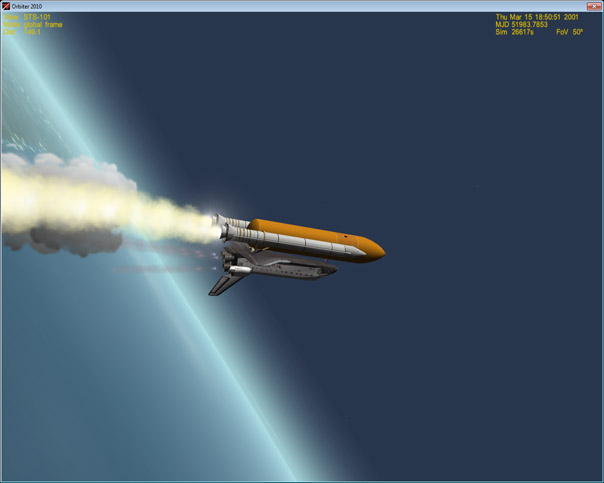
Atlantis departure ( in Orbiter 2010 )

Bye