With two axis and one throttle the stick is suitable for a lot of activities (like flying a Cessna, with a set of rudder pedals), but not for military purposes. We need at least a trigger and a weapon release button (the trigger is used only for the gun, while the weapon release button, well release – or drop, or launch, or whatever – the selected weapon, except when the selected weapon is the gun) to use this joystick for combat sim.
Anyway, first things first: MMjoy2 allows two types of button’s connection.
- Buttons connected via shift registers (any number up to 128 per device or a little less)
- Buttons connected via button matrix (up to 100 via a 10×10 matrix but with some limitations because of the high number of I/O pins used)
If you want to connect a single button, you have to create a 1×1 matrix (silly concept, I know, but that’s the way it works). MMjoy2 guidelines states that over about 10 buttons, shift registers are the way to go. I agree, maybe not with 10, maybe over 16 I’d go with shift registers too.
Back to the Top Gun Platinum (by the way I’ve seen Top Gun – the movie – in a cinema recently for the 30 years anniversary! In – almost – 3D!), we have 4 buttons and a “China Hat” switch.
Let’s have a look to the “DASH 1” of the McDonnel-Douglas F-4E:

Stick functions from the TO 1F-4E-1
So we have the aforementioned trigger [TRG], weapon release button [WPR], an Air-Refueling Disconnect button [ARD] and a nose-wheel steering button [NWS]. Then we have the “China Hat” 4-way switch that is used for pitch and ailerons’ trim control.
In the Top Gun Platinum, as I already wrote in the first post of the serie, the hat switch was connected as an axis. I – more or less – destroyed the PCB under the switch to leave the four push buttons in the hat disconnected. Total numbers of buttons for the new configuration: eight.
After a quick glance at the MMjoy wiki to check how to connect the buttons in a matrix using as less cables as possible, I decided to go with a 2×4 matrix, 2 rows and 4 columns.
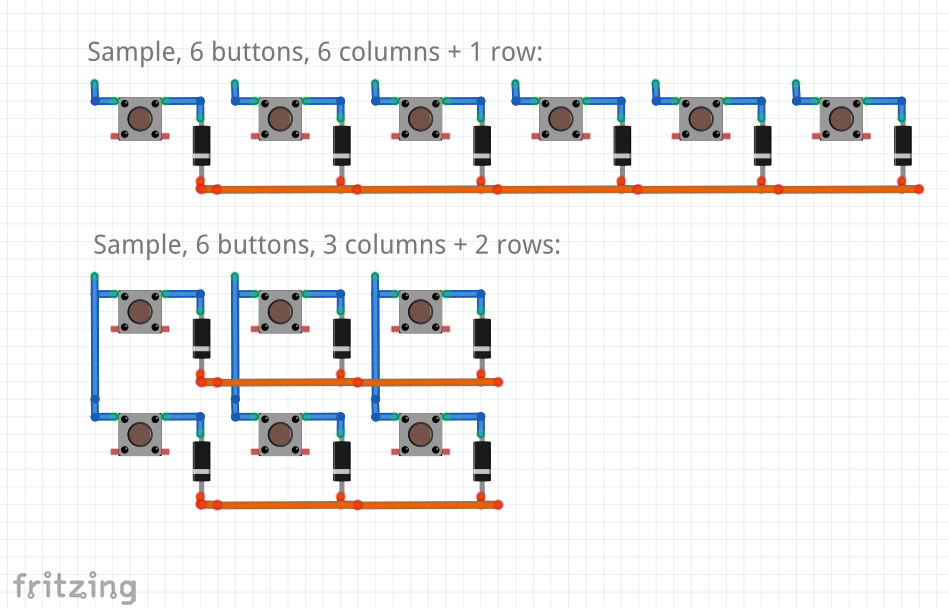
How to connect a button matrix to the MMJoy
The diodes are used to prevent ghosting and masking. I found a rather interesting article about those two problems with really simple to understand images. You can read more here [link]. For the diodes, I found eight identical signal diodes. They worked and so I decided to use them. 1N4148s are good to go.
Here is the grip with the new connections:
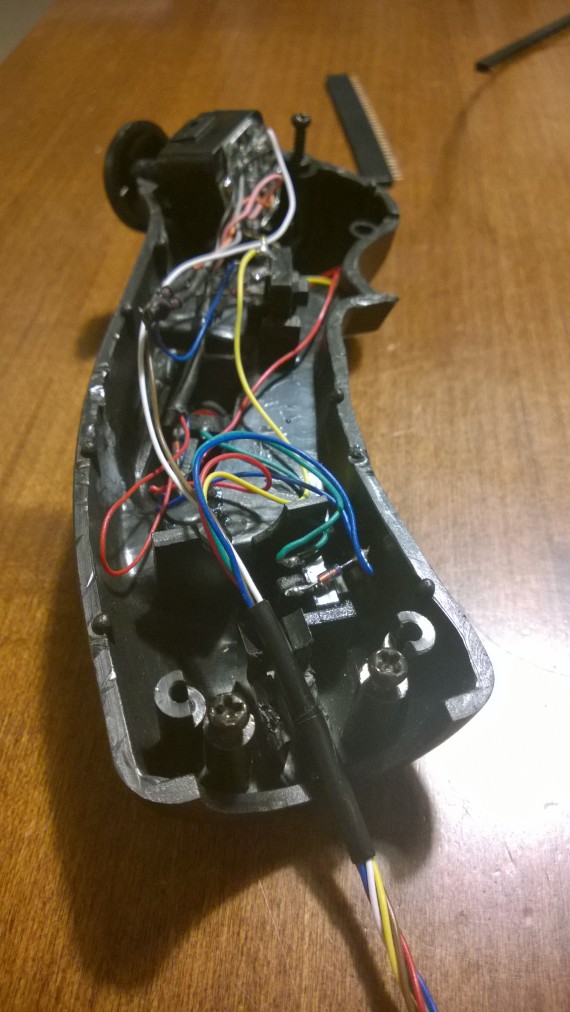
 Inside the grip
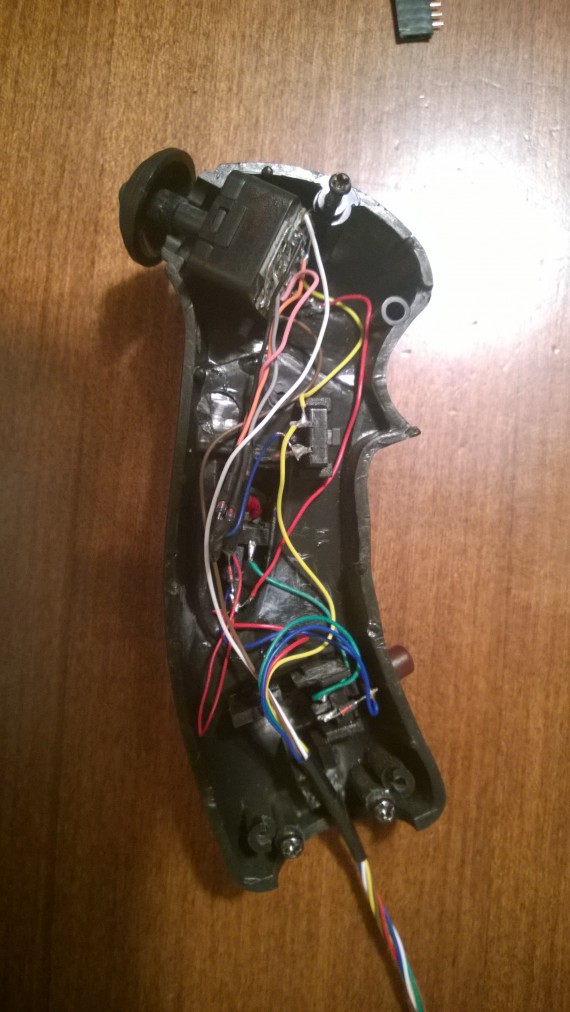
Once the buttons were connected to the Arduino, I started to setup the MMJoy settings for the buttons:
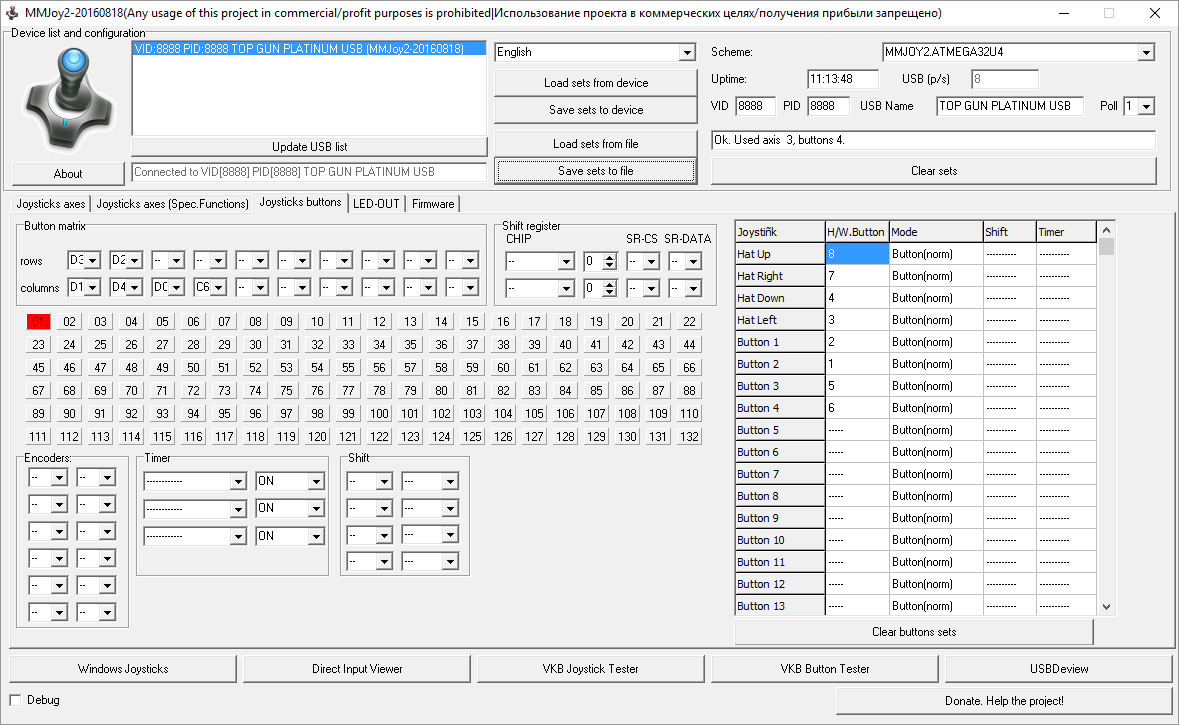
MMJoy setup utility
The really good thing about MMjoy is that any button in the matrix can be assigned to any button on the device. For instance, I like to assign [TRG] to button 1, [WPR] to button 2, etc. Also, any button can be assigned to the “Hat” up-left-down-right press.
In the end, under Windows, this is a screenshot of the device check screen under Windows 10 control panel:
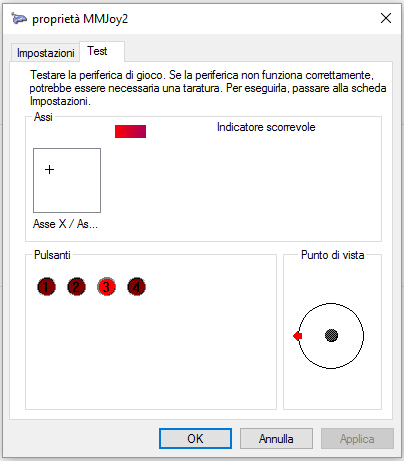
Windows 10 Joystick Control Panel
This pretty much sums up almost everything I’ve done. Next and final step will be about the finishing touches (but I’m still waiting for a pair of cables to arrive from Hong Kong).
Bye
Tags: DIY, Flight Controller, Thrustmaster, Top Gun Platinum
Categories: computers ,electronic ,flight simulators ,hardware ,howtos